If I had endless free time, I would work on DIY projects all day everyday. The reality is, this is the first holiday season in about 5 years since I have had any time to spare on DIY fun and you have no idea how great it feels to break out some paint and get my hands dirty again! Now that Charlie is 3 and Grace has just turned 6, they are my little helpers and our weekends are filled with art and crafts.
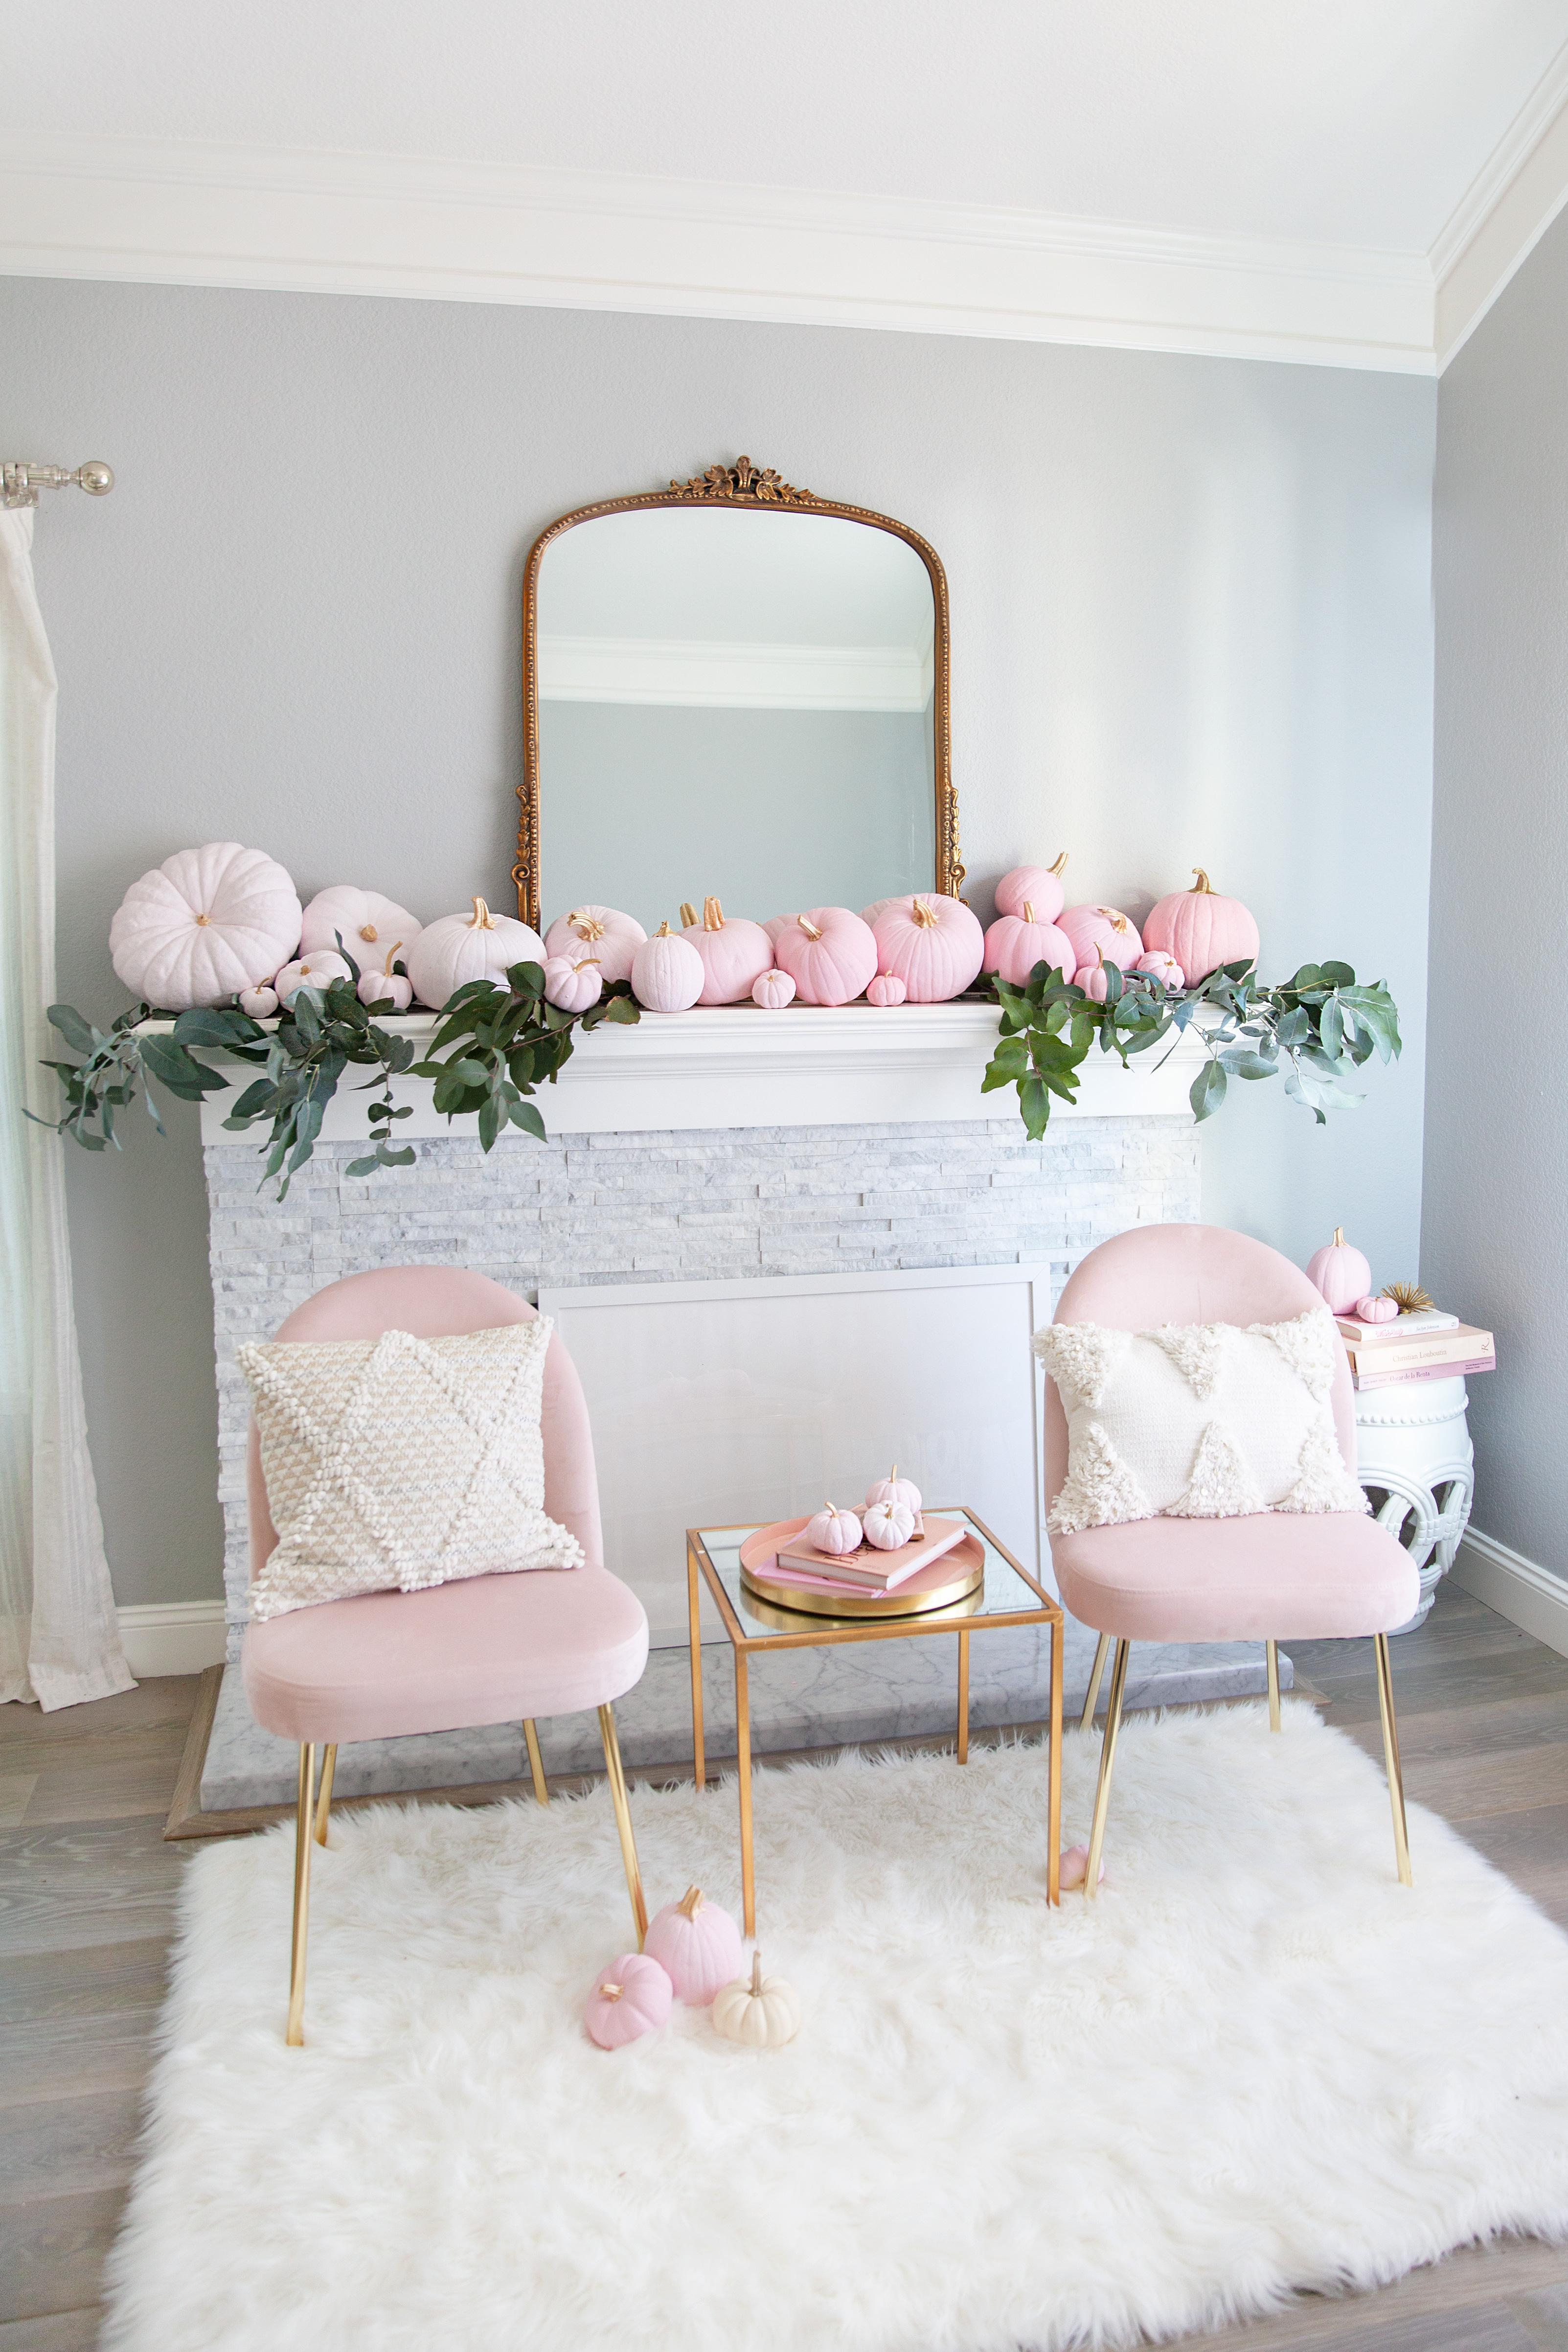
I wanted to do a fun pumpkin project this fall, and have something that would be a centerpiece of our living room, so a mantle display felt like a great choice. Of course it’s no surprise I’m a fan of all things blush, so this was going to be a girly situation. Ombre pink pumpkins and lots of them!
While this project took a fairly long time, mainly because I could only paint late night, or here and there a bit on weekends while the girls were busy with their own art projects along side me, you can very easily recreate this, in a simpler way with the same effect.
WHAT YOU WILL NEED:
Pumpkins – different shapes and sizes are best if you are going for the ‘random display’ effect. Don’t worry about the colors, the paint will cover orange just as well as white. (Tip: I always look for pumpkins with longer stems. They look so much more whimsical and special)
Paint – For this project specifically, I wanted to have a matte finish look, so I went for chalk paint. It dries fast and gives the perfect matte look.
Paint brushes: I used 3 different sizes. A very large brush for the big pumpkins and the smallest for painting the small stems gold. (medium for everything else)
Greenery – I am showing a few different options here for the final display. You can certainly have just the pumpkins on their own, but I think adding some greenery adds a dimension and breaks up all the pink a bit. I used eucalyptus leaves, which I love because they also fill the room with an amazing fresh scent.
Now there’s one slightly complicated part, but don’t worry its a very short one (step 2).
How to achieve the ombre effect and have a cohesive display. I.e don’t just randomly paint your pumpkins different shades of pink and hope at the end it will all somehow go together. You are dealing with different shapes and sizes and it is more like a game of Tetris than Jenga to make it all come together! So, with that being said, let’s get started, but first thing’s first. Get those pumpkins prepped properly!
Step ONE:
Preserve your pumpkins. This step is very important, so don’t skip it! Unless you want to put in all the work only to have your pumpkins rotting two weeks later.
Fill a bath, bucket or whatever container you prefer that would fit all your pumpkins mixing water with:
– 1 tbsp of dish soap per gallon
– 1 tbsp of bleach per gallon
Place your pumpkins in, stems down, and let soak for 10 minutes. This kills any bacteria that is on the surface, and could lead to early rotting.
That’s it!
Step TWO:
Put all of your pumpkins onto the mantle, arranging them exactly how you want the finished product to look. Take a picture! Trust me, it really helps.
Then, visually divide your pumpkins into 4 groups. These are your four ombre shades.
Write a number on each pumpkin before taking them off. Group 1 will all have a 1 on them, group 2 will have a 2 and so on.
Step THREE:
Now that you have your groups you are ready to start painting!
Pick the shades you would like to do. I used two colors, blending the in-between shades here but you can use separate jars for a more intense color variation.
My color mix:
Group 1: All Powder Pink (color 1)
Group 2: 2 parts Powder Pink, 1 park Blush (color 2)
Group 3: 2 parts Powder Pink, 2 parts Blush
Group 4: All Blush
(translate to any color combination):
Group 1: 100% color 1
Group 2:2 parts color 1, 1 part color 2
Group 3:50% color 1, 50% color 2
Group 4:100% color 2
Step FOUR:
Let’s get started. Put on the Real Housewives of wherever and breakout your paintbrushes because you’ll be here for a while!
To get the desired look, you will have to do two coats of paint. Some of mine have 3. Make sure you really get the underside of each pumpkin as far as you can while still letting it sit upright, because if you don’t you will see the unpainted bottom sides when it is up on the mantle later.
Painting the stems – paint the stem of the pumpkin with the lightest shade, in this case the powder pink. If you are using darker colors, buy white as well and use it to paint the stem. If you paint the stem gold without first painting it light (or white) the gold won’t show up well and look dull.
After your initial light color dries, apply two coats of gold.
As you are painting all the groups, I suggest keeping them separated. Your two middle shades will be very similar and easy to lose track of when there are 10 pumpkins in front of you. Trust me on this one!
Step FIVE:
After the last coat is dry and all the groups are done, you are ready for Tetris! Remember your photo? Guess what’s going to come in handy right now, unless you have photographic pumpkin memory.
Place your four groups from left to right at the bottom of the mantle. Using your photo for reference recreate the look you initially created before the pumpkins were painted.
Step back and enjoy your gorgeous ombre rainbow cause you did it boo!
Optional step SIX:
If you plan on adding greenery as pictured here, you would place the branches under the pumpkins as you go. This is sterdier than sliding them in after the display is done.
Well, that’s all. I hope to be able to make time for many more simple tutorials this holiday season, but for now, I am going to enjoy my little blush pumpkin heaven to the max!