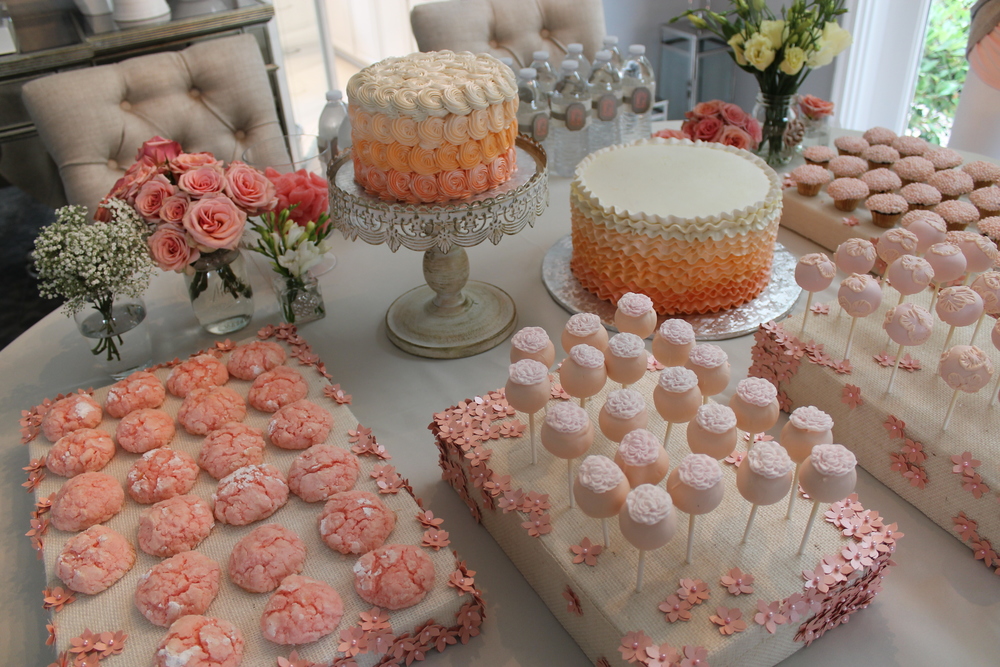
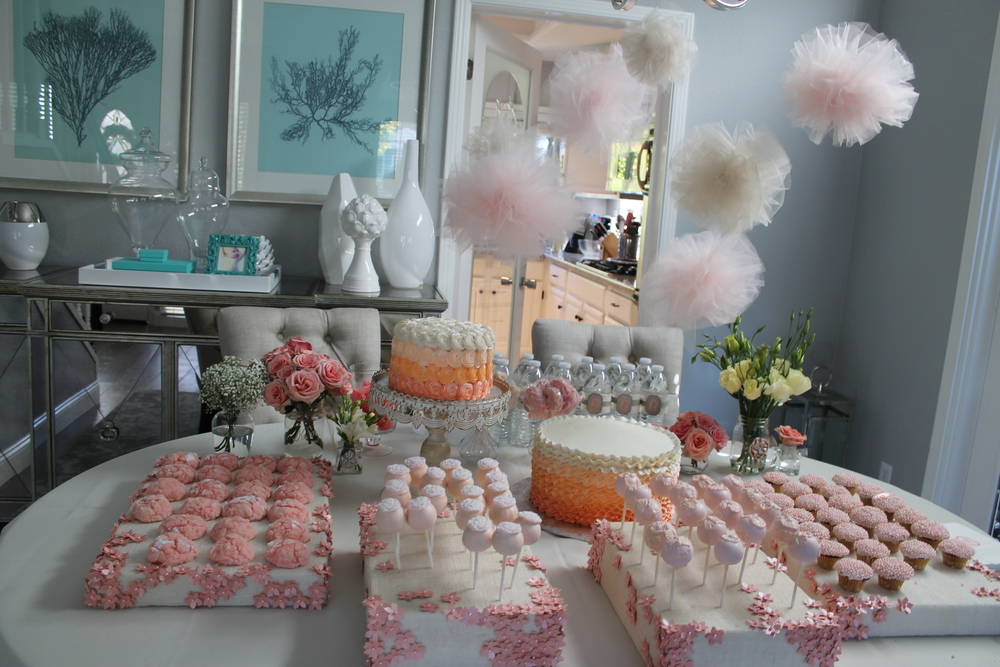
I wanted to make something whimsical, girly and different to display all of the deserts for my daughter’s first Birthday party. Here is a tutorial on how to make these inexpensive, festive trays.
Materials:
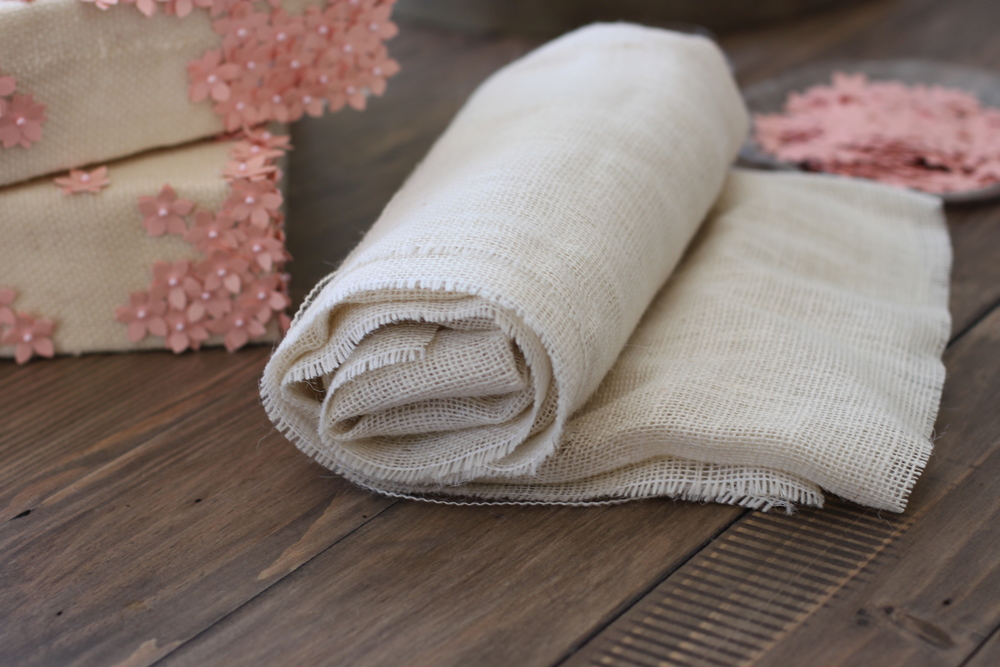
1. Burlap fabric
2. Styrofoam boards (can be easily found at any craft store)
3. Craft Paper (think – card stock)
4. Flower punch (Martha Stewart has some great options for various flower designs)
5. Pins with a pearl back
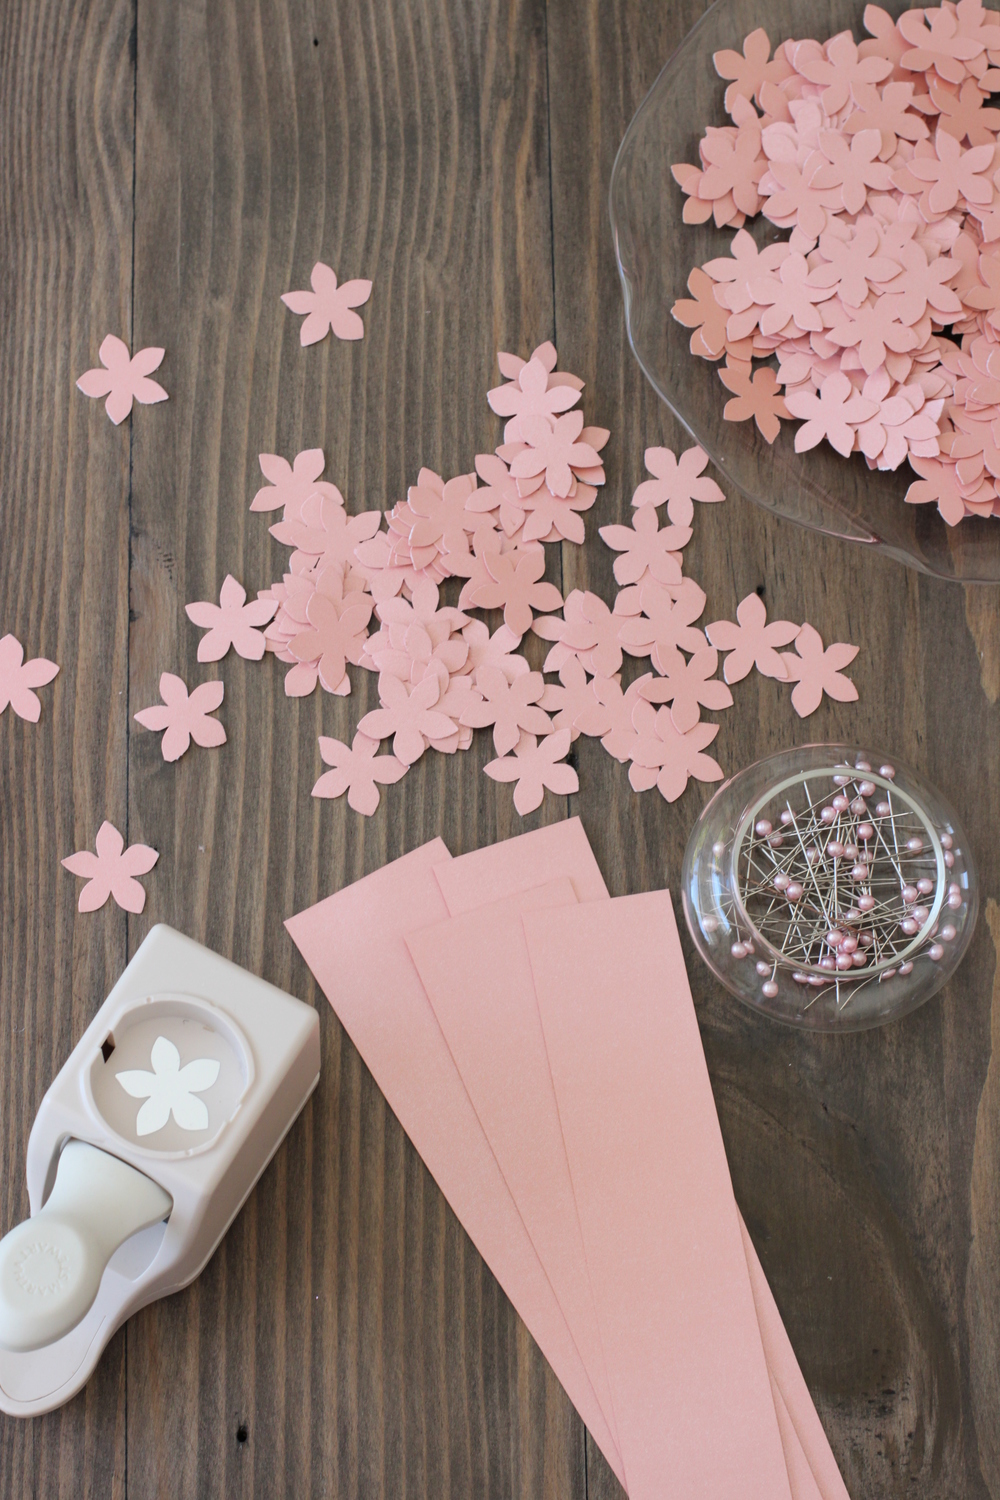

~ Start out by punching out your flowers. I recommend cutting your paper into strips first to make this step faster.
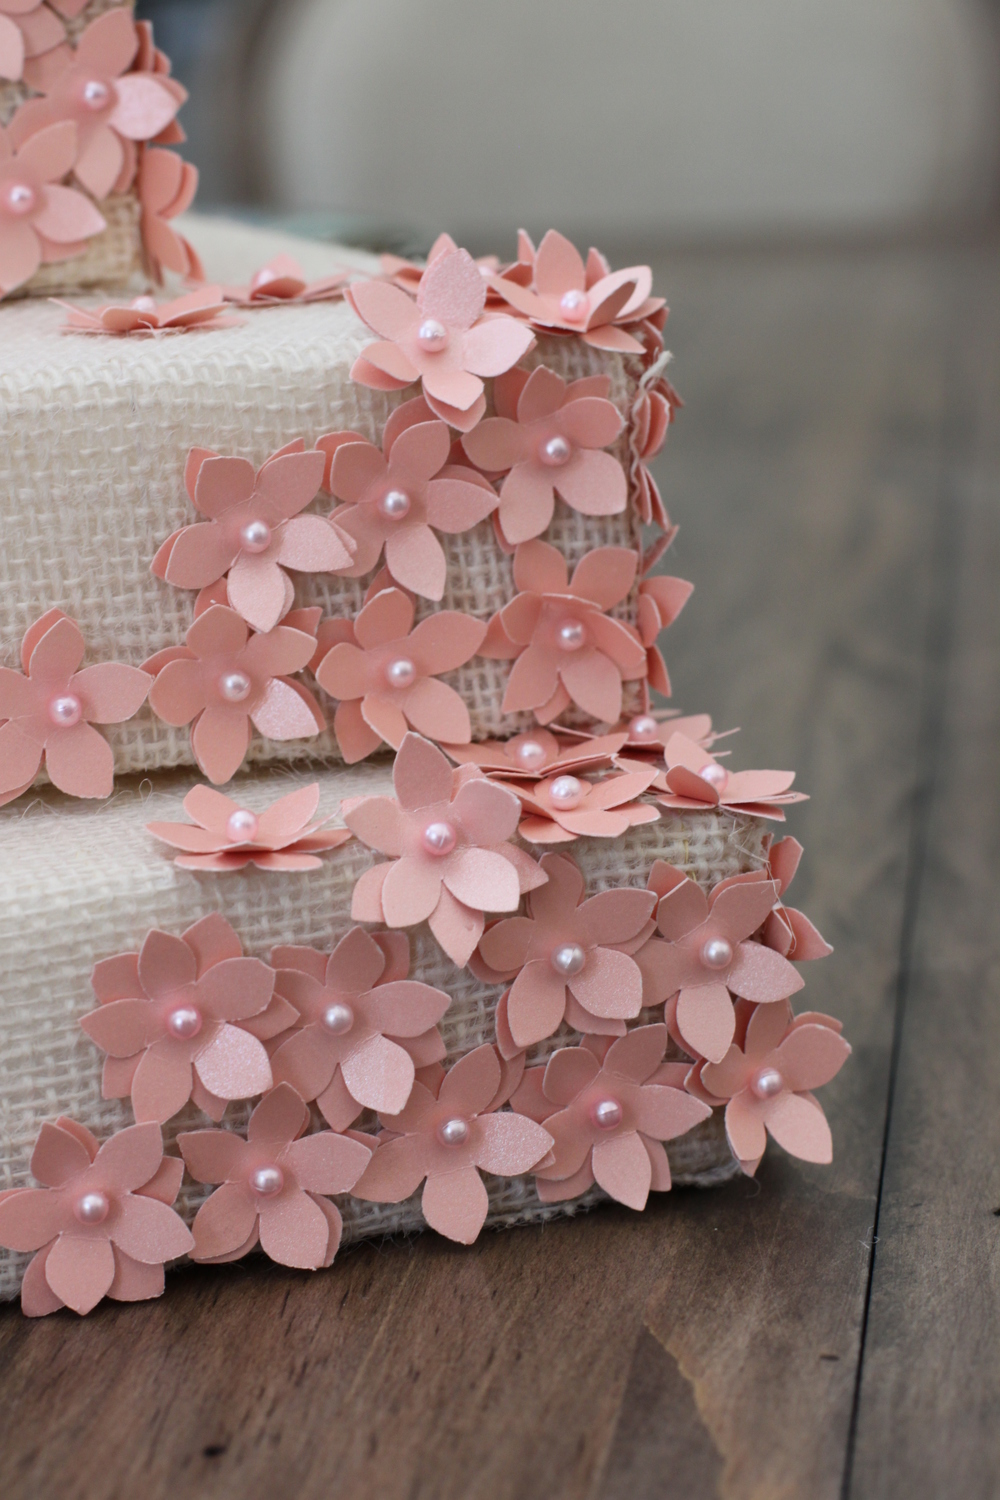
~ Cover your Styrofoam boards with the burlap, using a hot glue gun, folding the edges over, like you are covering a present. Make sure the fabric is tight over the Styrofoam so there is no movement.
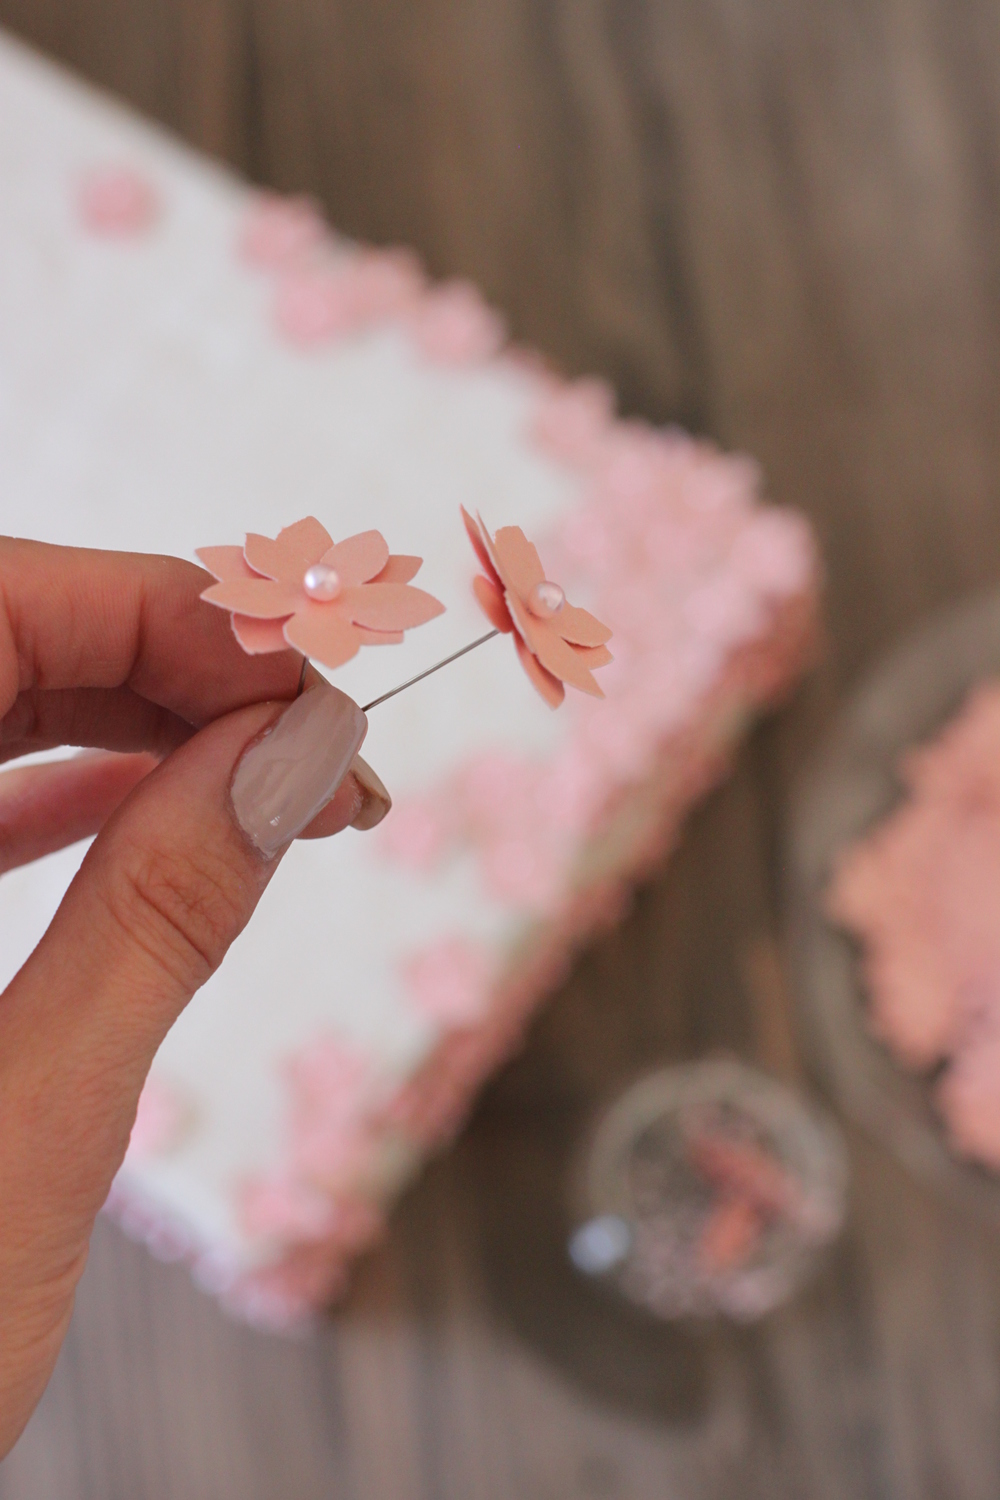
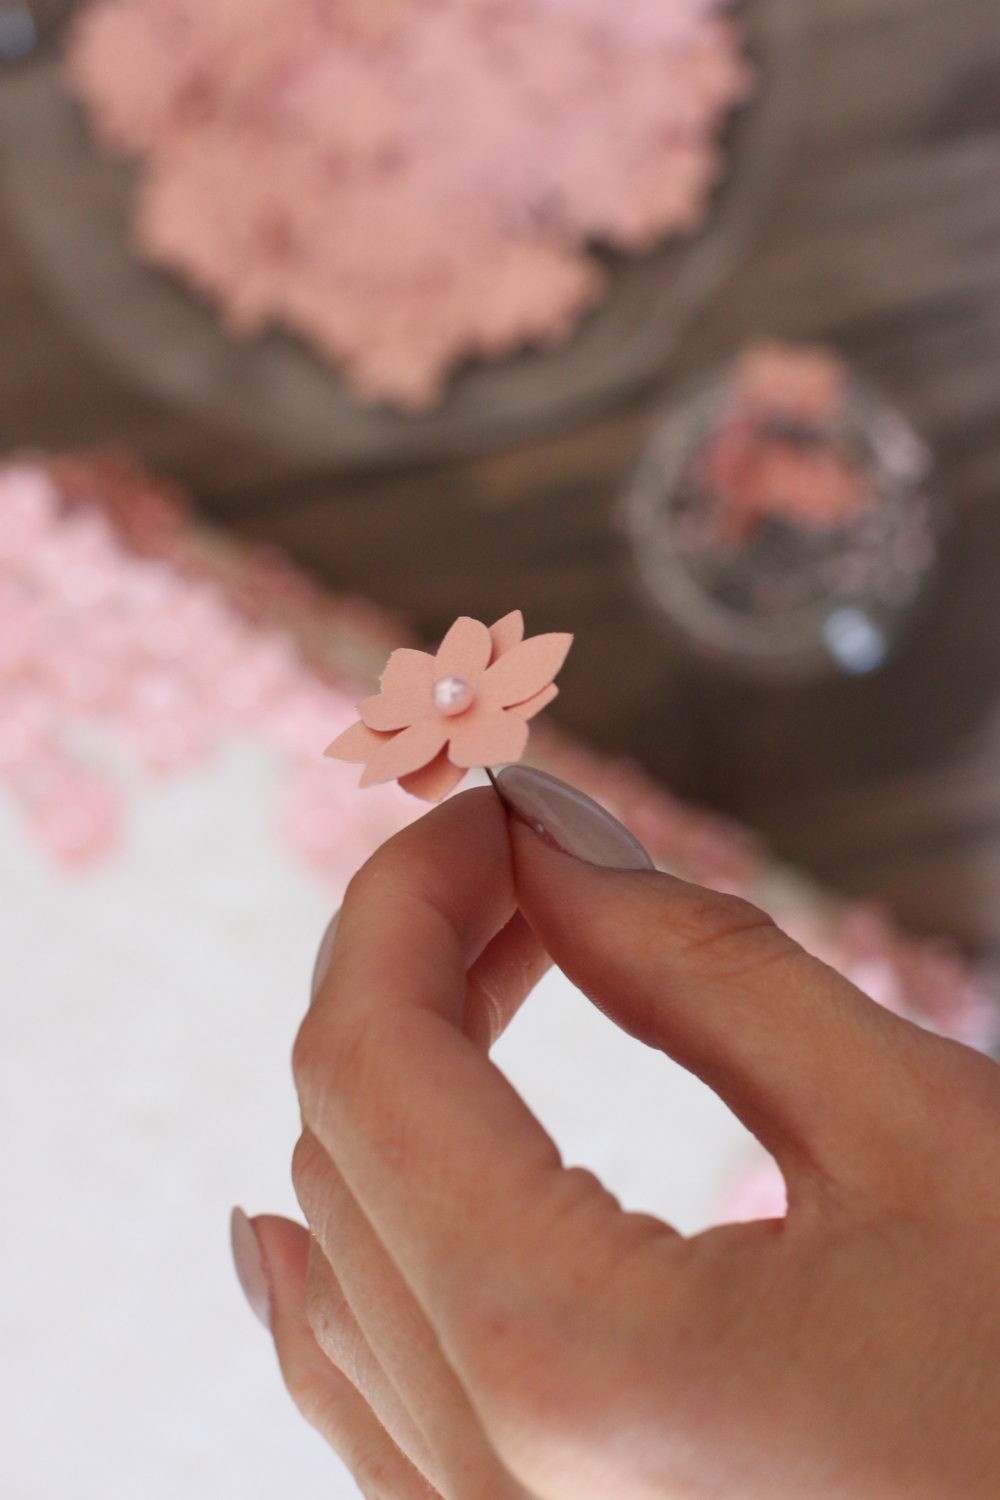
~ Once you have all of your flowers punched out, take two flowers, put them together and push a pin through. Make sure the two flowers overlap to create two layers , not lay one directly on top of the other, hiding its petals. Continue this for as many flowers as your tray will require. Mine have over 100 flowers.
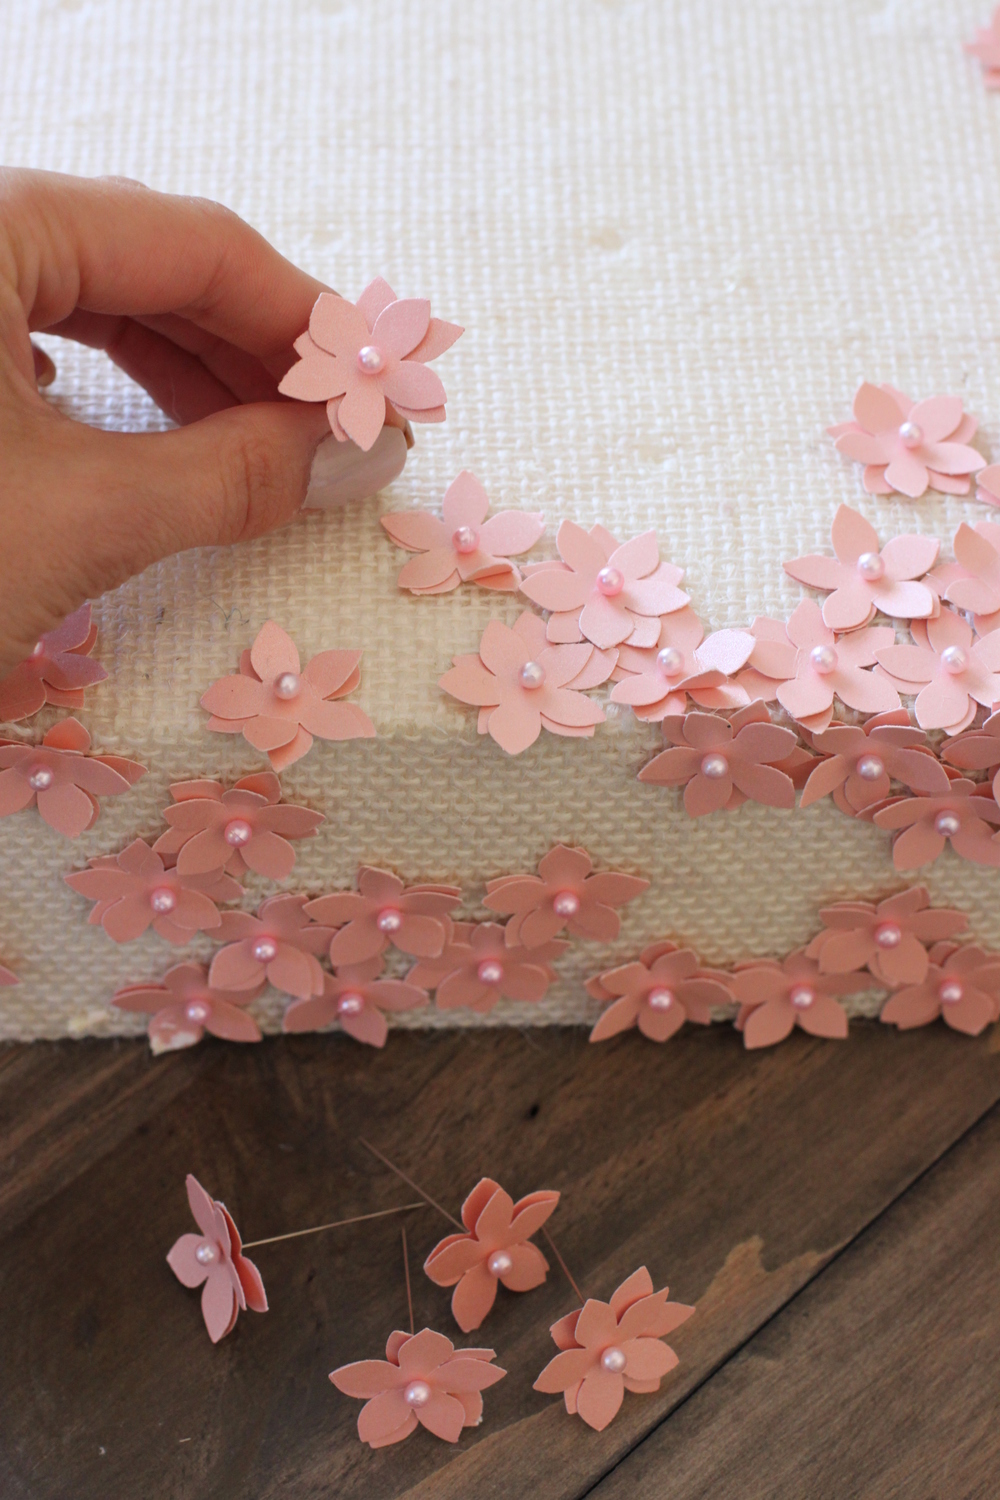
~ Now comes the fun part. You are ready to make your flower design. For this particular tray, I wanted to create a look as if the flowers were scattered along the tray, so the pattern is very loose with flowers clustered in groups with some fly aways.
~ That’s it! Now you just have to pick the fun deserts to go on top! I did a mix of cookies, cake pops and cupcakes. Enjoy!
Thanks for visiting,
-V